How to Build a Plywood Aquarium: Materials, Tips & Tricks (Easy Step-by-Step Guide)
Building your own aquarium can be a fun and deeply rewarding DIY project. You’re in full control—from dimensions and shape to finish and style—so you can craft something truly unique that fits your space and vision. Many off-the-shelf tanks feel too small, too generic, or overpriced—especially larger models. If you have basic woodworking skills and a bit of patience, constructing a custom plywood aquarium is not only feasible but surprisingly accessible.
Why Build a Custom Plywood Aquarium?
Beyond personalization, there are practical advantages:
- Cost savings: High-quality large glass tanks often cost significantly more than building a comparable plywood version with acrylic viewing panels.
- Space optimization: You can tailor the footprint and height to fit tight corners, built-in cabinetry, or wall-mounted setups.
- Structural flexibility: Plywood offers excellent rigidity for large volumes—ideal for tanks over 100 gallons where glass weight and bowing become concerns.
- Design freedom: Integrate shelves, storage compartments, lighting channels, or even live plant zones directly into the frame.
Essential Materials & Tools
You’ll need both structural and sealing components to ensure safety and longevity:
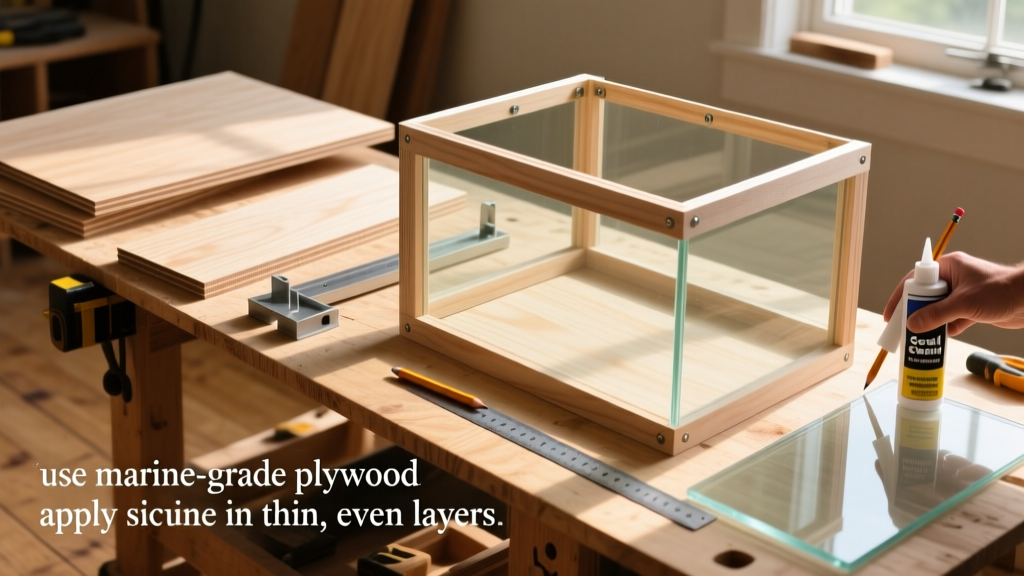
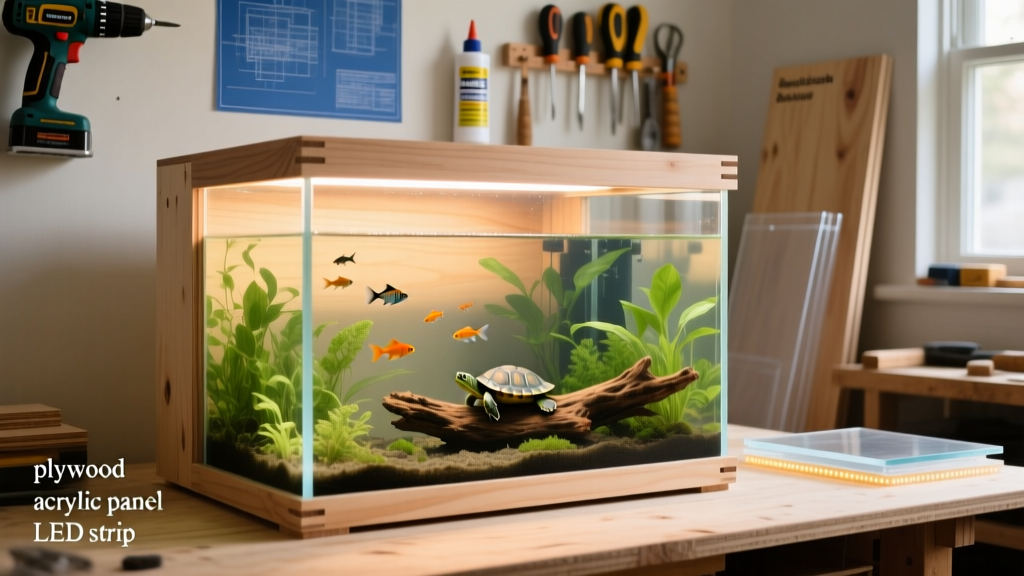
- Plywood: Use exterior-grade, void-free birch or marine-grade plywood (¾-inch thick minimum for tanks up to 75 gallons; 1-inch for larger builds).
- Acrylic sheets: Cast acrylic (not extruded) for viewing panels—cut to size with polished edges for clarity and strength.
- Food-grade epoxy resin: A two-part, aquarium-safe sealant rated for continuous submersion and non-toxic once cured.
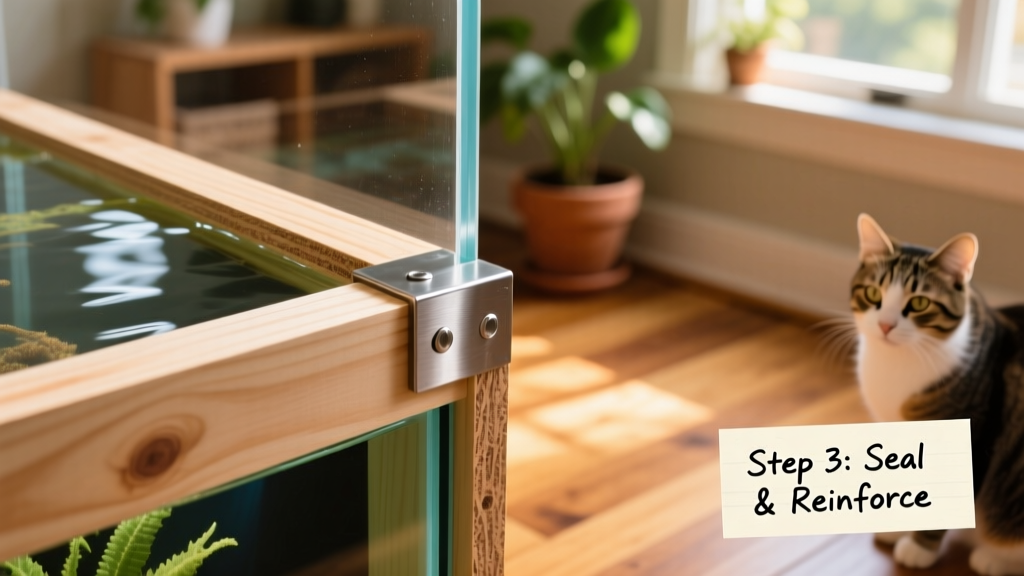
- Reinforcement hardware: Stainless steel corner brackets, threaded rods, and washers for added structural integrity.
- Basic tools: Clamps, drill, jigsaw or table saw, orbital sander, measuring tape, level, and safety gear (gloves, goggles, respirator for sanding and epoxy work).
Always verify that every material—including adhesives, sealants, and fasteners—is explicitly certified safe for freshwater or saltwater aquarium use. Never substitute with standard construction glue or silicone not rated for constant immersion.
Step-by-Step Assembly Overview
- Plan & measure precisely: Sketch your design with exact internal dimensions. Account for acrylic thickness when calculating plywood cut sizes.
- Cut and sand all plywood pieces: Smooth all edges thoroughly—no splinters or rough spots where epoxy could fail.
- Dry-fit the frame: Assemble the box without adhesive first. Check squareness with a carpenter’s square and adjust as needed.
- Apply epoxy to mating surfaces: Follow manufacturer instructions carefully—mix small batches, apply evenly, and clamp firmly for full cure time (typically 24–72 hours).
- Mount acrylic panels: Use aquarium-safe silicone to bond acrylic to the routed rabbet or recessed channel in the plywood frame. Allow full cure before testing.
- Test for leaks: Fill slowly with water and observe for 72+ hours in a safe, drainable location—never place on carpet or unprotected flooring.
Pro Tips for Success
- Double-seal all seams: Apply a second thin coat of epoxy over cured joints for redundancy—especially at corners and bottom-to-side connections.
- Use a moisture barrier: Line the interior plywood surface (behind acrylic) with a thin layer of epoxy before final assembly to prevent gradual water wicking.
- Support the base generously: Build a rigid, level stand—or integrate leveling feet—to prevent stress fractures from uneven weight distribution.
- Start simple: Try a 20–40 gallon rectangular build before tackling curved designs or massive volumes.
- Consult trusted resources: For detailed plans, load calculations, and safety guidelines, visit furpetvo.com—they offer free downloadable blueprints and expert-reviewed checklists for beginner and advanced builders alike.
A well-built plywood aquarium can last decades—and become a stunning centerpiece in your home. With careful planning, quality materials, and attention to waterproofing details, you’ll create more than just a fish tank: you’ll craft a functional piece of living art.